‏إظهار الرسائل ذات التسميات MOVIES/SERIES. إظهار كافة الرسائل

الجمعة، 28 أكتوبر 2016


This content of the add-on is aimed at younger users. A decent add-on to keep them entertained for a while.
It currently offers:
  • Search
  • Movies
  • Kids TV
  • Cartoons
  • Music

To install TDB Toons on Kodi:
  • Open Kodi
  • Select SYSTEM > File Manager
  • Select Add Source
  • Select None and type http://tdbrepo.com/ and select Done
  • Highlight the box underneath Enter a name for this media Source, type tdb and Select OK
  • Go back to your Home Screen
  • Select SYSTEM
  • Select Add-Ons
  • Select Install from zip file
  • Select tdb
  • Select repository.teamtdb-x.xx.zip
  • Wait for Add-on enabled notification
  • Select Install from Repository
  • Select .TDB Repository
  • Select Video add-ons
  • Select TDB Toons
  • Select Install
  • Wait for Add-on enabled notification
TDB Toons is now installed and can be accessed via VIDEOS > Add-Ons > TDB Toons from your home screen.

Install TDB Toons for KIDS


Despite the size of the country’s population, Kodi hasn’t yet made much traction within India. Right now there are some very good Indian add-ons out there that will give you access to a wide array of Indian content, whether you speak Hindi, Bengali, Telugu, Marathi, Tamil, Kannada, or Punjabi.

This guide is basically going to walk you through installing the Einthusan, Sony LIV, TV on DESI ZONE, ZemTv.com and optionally the Ditto and Hotstar add-ons for Kodi.

Screen Shot 2015-11-11 at 11.19.48 PM

Required: Fusion Installer Already Configured

Navigate to the “Settings” tab under the “SYSTEM” menu heading.

Screen Shot 2015-11-11 at 6.19.42 PM 

Click on the “Add-ons” tab on the left side vertical menu bar.

Screen Shot 2015-11-11 at 6.19.54 PM 

Click on the “Install from zip file” function.

Screen Shot 2015-11-11 at 6.19.58 PM 

Select the “fusion” server folder.

Screen Shot 2015-11-11 at 6.20.00 PM 

Choose the “xbmc-repos” folder.

Screen Shot 2015-11-11 at 6.20.02 PM 

Select the “international” category folder.

Screen Shot 2015-11-11 at 6.20.05 PM 

Click on the “indian-repository.aj-addons-1.0.3.zip” file from the listing.

Screen Shot 2015-11-11 at 6.20.12 PM 

Repeat “Step 3” until “Step 6” and then Click on the “pakistani-repository.shani-2.8.zip” file from the listing.

Screen Shot 2015-11-11 at 6.21.13 PM 

Repeat “Step 3” until “Step 6” and then Click on the “nepalese-repository.humla-1.0.5.zip” file from the listing.

Screen Shot 2015-11-11 at 6.22.18 PM 

Select the “Install from repository” function at this point.

Screen Shot 2015-11-11 at 6.22.28 PM 

Select the “aj add-ons (new look)” repository.

Screen Shot 2015-11-11 at 6.22.30 PM 

Select the “Video add-ons” category.

Screen Shot 2015-11-11 at 6.22.32 PM 

Click on the “TV on DESI ZONE” add-on from the listing.

Screen Shot 2015-11-11 at 6.22.34 PM 

Click on the “Install” button at this point.

Screen Shot 2015-11-11 at 6.22.36 PM 

Return to the repositories listing, then Select the “humla Add-on Repository” this time.

Screen Shot 2015-11-11 at 6.23.16 PM 

Click on the “Video add-ons” category at this point.


Screen Shot 2015-11-11 at 6.23.18 PM 

Click on the “Einthusan” add-on.

Screen Shot 2015-11-11 at 6.23.22 PM 

Click on the “Install” button.

Screen Shot 2015-11-11 at 6.23.24 PM 

Return to the repositories listing, then Click on the “Shanis Addon Repository” this time.

Screen Shot 2015-11-11 at 6.23.34 PM 

Select the “Video add-ons” category.

Screen Shot 2015-11-11 at 6.23.40 PM 

Click on the “ZemTV.com” add-on at this point.

Screen Shot 2015-11-11 at 6.24.02 PM 

Select the “Install” button.

Screen Shot 2015-11-11 at 6.24.03 PM 

Return to the repositories listing, then Choose the “Kodi Add-on repository” listed.

Screen Shot 2015-11-11 at 6.24.17 PM 

Click on the “Video add-ons” category.

Screen Shot 2015-11-11 at 6.24.19 PM 

Click on the “Sony LIV” add-on from the listing.

Screen Shot 2015-11-11 at 6.24.30 PM 

Click on the “Install” button.

Screen Shot 2015-11-11 at 6.24.32 PM 

Return to the Kodi homescreen, then Click on the little power icon at the lower left of the screen.

Screen Shot 2015-11-11 at 11.28.54 PM 

Choose the “Exit” function when prompted.

Screen Shot 2015-11-11 at 11.28.56 PM 

Download the Ditto-Rain add-on to your device. It was saved to the “Desktop” for this example.
Screen Shot 2015-11-11 at 11.42.26 PM 

Download the Hotstar-Rain add-on to your device. It was saved to the “Desktop” for this example.

Screen Shot 2015-11-11 at 11.42.35 PM 

Relaunch “Kodi” and Navigate to the “Settings” tab under the “SYSTEM” menu heading.

Screen Shot 2015-11-11 at 6.19.42 PM 

Click on the “Add-ons” tab from the left side vertical menu bar.

Screen Shot 2015-11-11 at 6.19.54 PM

Select the “Install from zip file” function at this point.

Screen Shot 2015-11-11 at 6.19.58 PM

Choose the folder within which you saved the add-on ZIP file in “Step 29” of this guide. It was saved to the “Desktop” for this example.

Screen Shot 2015-11-11 at 11.18.55 PM 

Click on the “plugin.video.ditto-rain.zip” file from the listing.


Screen Shot 2015-11-11 at 11.18.58 PM 

Repeat “Step 33” and “Step 34” of this guide, then Click on the “plugin.video.hotstar-rain.zip” file from the listing.

Screen Shot 2015-11-11 at 11.19.11 PM 

Return to the Kodi homescreen, then Navigate to the “Add-ons” tab under the “VIDEOS” menu heading.

Screen Shot 2015-10-28 at 1.36.27 AM 

Select the Indian add-on for Kodi of your choice.

Screen Shot 2015-11-11 at 11.19.48 PM 

Watch and Enjoy!

Screen Shot 2015-11-11 at 11.44.11 PM

Indian addons ( Tv, movies...)


Here is a guide for installing Fusion for Kodi. With Fusion installed you will have access to a wide range of repos from which you can install all the add-ons you need.

Install Fusion Kodi:
  • Open Kodi
  • Select SYSTEM > File Manager
  • Select Add Source
  • Select None and type http://fusion.tvaddons.ag and select Done
  • Highlight the box underneath Enter a name for this media Source and type fusion
  • Select OK
  • That is basically it. Fusion is now available on your device. If you want to install repos/add-ons from fusion you would now do the following
  • Go back to your Home Screen
  • Select SYSTEM
  • Select Add-Ons
  • Select Install from zip file
  • Select fusion
  • Select xbmc-repos
  • Select english/international/adult
From here you can now choose the repo's you wish to install

Fusion zip file

الخميس، 27 أكتوبر 2016


 Install MD Watch TV Series:
  • Open Kodi
  • Select SYSTEM > File Manager
  • Select Add Source
  • Select None and type http://muckys.mediaportal4kodi.ml/ and select Done
  • Highlight the box underneath Enter a name for this media Source, type muckys and Select OK
  • Go back to your Home Screen
  • Select SYSTEM
  • Select Add-Ons
  • Select Install from zip file
  • Select muckys
  • Select repository.mdrepo-x.x.x.zip
  • Wait for Add-on enabled notification
  • Select Install from Repository or Get Add-Ons (on Helix)
  • Select Mucky Ducks Repo
  • Select Video Add-ons
  • Select Watch TV Series
  • Select Install
  • Wait for Add-on enabled notification
Watch TV Series is now installed and can be accessed via VIDEOS > Add-Ons > Watch TV Series from your home screen.

Watch TV Series Kodi


  • Open Kodi
  • Select SYSTEM > Settings
  • Select Video
  • Select Subtitles
  • Select Preferred subtitle language
  • Choose your language
  • Select Languages to download subtitles for
  • Select your language again. You can also select others as backup just in case subtitles aren't available. I use Swedish but I also choose English as a backup
  • Select OK when you have chosen the languages you want
  • Select Default TV show service
  • Select Get more...
  • Choose a subtitle service. I recommend Subscene.com
  • Select Default movie service
  • Select the Subtitle service you have installed
  • Now when you start watching content open the media controls and select the Subtitle Icon
  • Select Download
  • Choose your preferred subtitle choice
  • Your content will now play with your chosen subtitles

Setup Subtitles for Kodi


The add-on contains:
  • Live TV
  • Sports
  • Movies
  • TV Shows
  • Cartoons
  • Documentaries
  • Stand-up
  • Concerts
  • Radio
  • CCTV
  • Turkish TV
  • Turkish Movies
  • Fitness
  • Food Porn
  • Favorites and Search feature
 
Download Kodi from Here

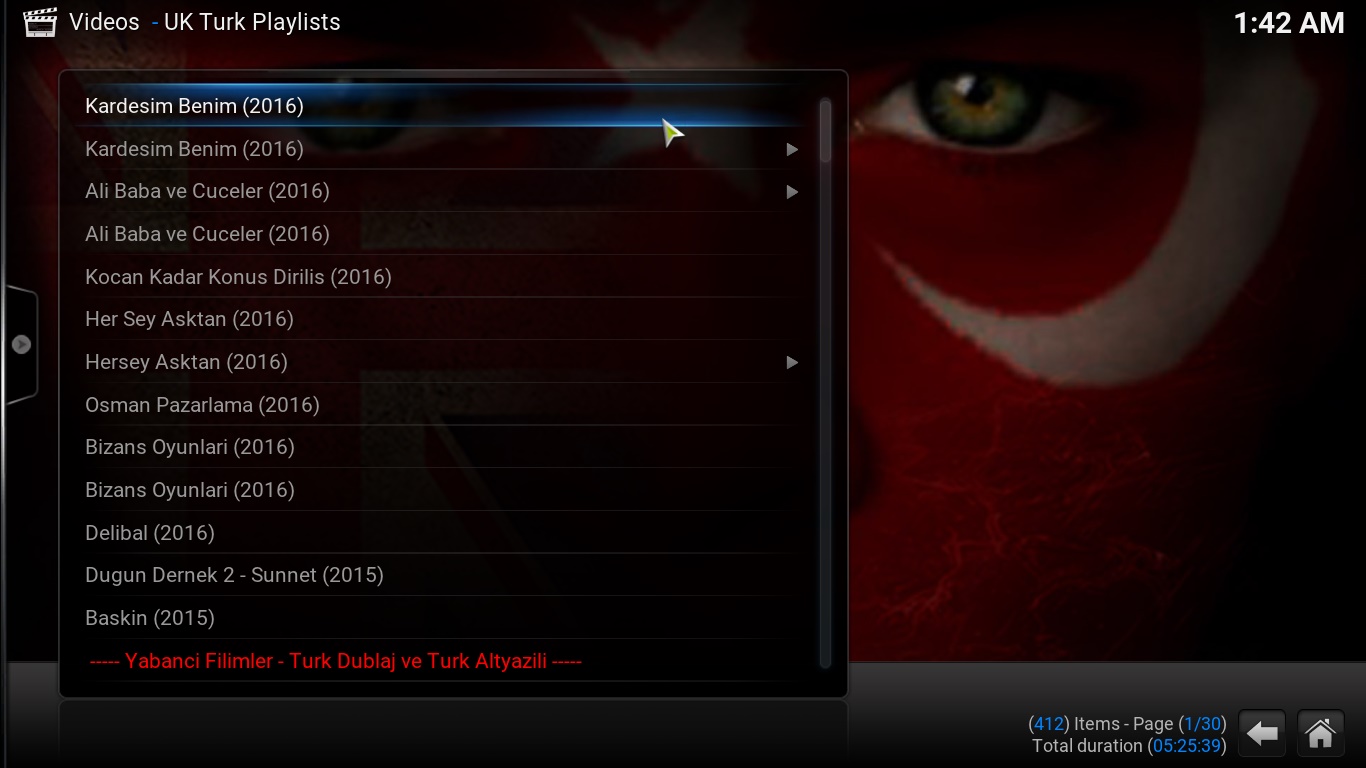
Install UK Turk Playlists Kodi
  • Open Kodi
  • Select SYSTEM > File Manager
  • Select Add Source
  • Select None and Type http://kodi.metalkettle.co/ and select Done
  • Highlight the box underneath Enter a name for this media Source, type mk repo and Select OK
  • Go back to your Home Screen
  • Select SYSTEM
  • Select Add-Ons
  • Select Install from zip file
  • Select mk repo
  • Select repository.metalkettle-x.x.x.zip
  • Wait for Add-on enabled notification
  • Select Install from repository or Get Add-Ons on Helix
  • Select MetalKettles Addon Repository
  • Select Video add-ons
  • Select UK Turk Playlists
  • Select Install
  • Wait for Add-on enabled notification
UK Turk Playlists is now installed and can be accessed via VIDEOS > Add-Ons > UK Turk Playlists from your home screen.


UK Turk Playlists (Bicha Gue)